 MCF User Guide
Site Settings
Site Settings is the home for your council's identity — its name, logo, tagline, footer text and the geographic location used by maps and weather. It is one of the first places to visit when setting up a new website.
In the admin panel, open the Settings group in the left-hand menu and choose Site Settings. The page is organised into tabs, and each tab has its own Save button — saving one tab does not affect the others, so you can fill them in at your own pace.
The tabs at a glance
Site Settings groups related options into tabs across the top of the page:
| Tab | What it controls |
|---|---|
| Branding | Council name, logo, logo sizing, and tagline. |
| Theme & Layout | Colour theme, navigation and page layout. Covered in Themes & Layout. |
| Contact | Public contact email, phone, address and office hours. |
| Parish Location | Map centre point, zoom and parish boundary. |
| General | Footer text and the default meta description. |
Branding & site identity
The Branding tab is where your council's visual identity is set. These values appear in the website header, the browser tab, and the admin panel itself.
- Open Settings > Site Settings and select the Branding tab.
- Enter your Council Name — the full official name of your parish council.
- Choose your Logo from the Media Library (upload it there first if you have not already).
- Optionally add a Tagline — a short strapline shown alongside the name.
- Select Save on the Branding tab.
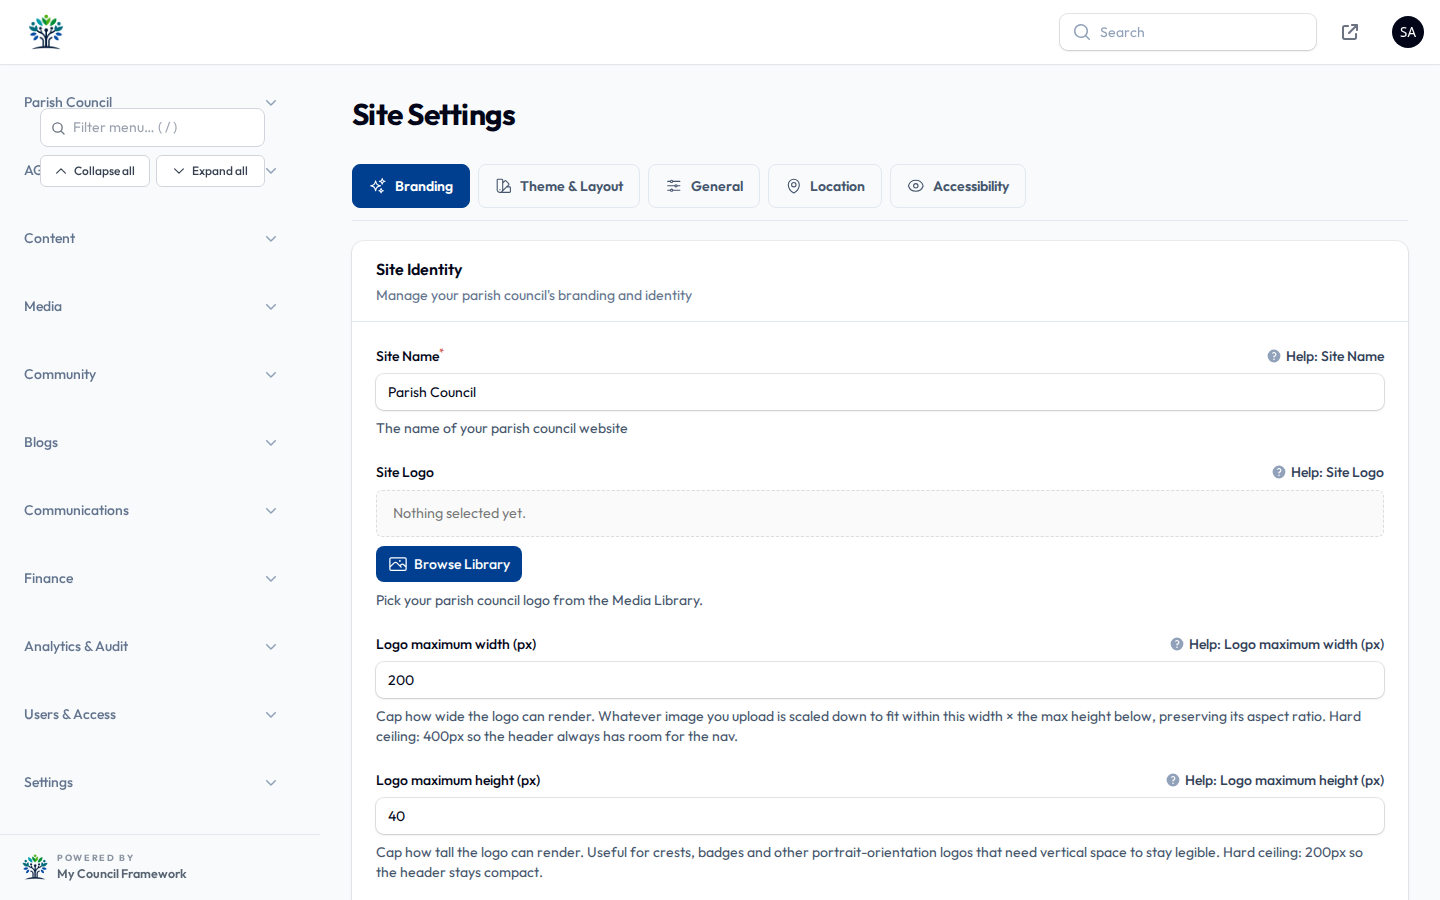
Controlling logo size
Logos come in all shapes, so you can cap how large yours renders without distorting it:
| Setting | What it does |
|---|---|
| Logo maximum width | The widest the logo can display, in pixels (default 200). |
| Logo maximum height | The tallest it can display, in pixels (default 40). Useful for tall crests or badges that need vertical room. |
| Show the council name next to the logo | Turn this off when your logo image already includes the council's name. The name remains available to screen readers through the logo's alt text. |
The logo is always scaled to fit within the width and height you set, keeping its proportions. If a crest looks too small, raise the maximum height rather than stretching the image.
Contact details
The Contact tab holds the council's public contact information. This appears on your contact page, in the footer, and wherever residents need to get in touch.
- Contact email — the address residents and the contact form reply to.
- Contact phone — your council's public telephone number.
- Contact address — the postal or office address.
- Office hours — set opening times for each day of the week.
Parish location
The Parish Location tab sets the geographic centre of your parish. These values are shared by the interactive map, the weather widget and the virtual tour, so you only set them once.
- Centre latitude and Centre longitude — the middle of your parish area.
- Default zoom — how zoomed in maps start (higher numbers are closer in).
- Parish boundary coordinates — an optional outline drawn on maps.
Search for your parish on Google Maps, right-click the centre of your area, and the latitude and longitude will appear at the top of the menu. Copy them into the two fields here.
General settings
The General tab covers two site-wide pieces of text:
- Footer text — the copyright or attribution line shown at the very bottom of every page.
- Default meta description — the description search engines show when a page has no description of its own. (See SEO & Language for more on search-engine settings.)
Because every tab saves independently, a change is only stored once you select the Save button on that particular tab. If you switch tabs without saving, your changes on the previous tab are not kept.
Modules & feature toggles
Open Settings > Modules and select the Feature Toggles tab to switch whole features of your site on or off. Each toggle controls one part of your website.
The clerk-facing features you can switch here include:
- Venue Booking
- Event Ticketing
- Resident Issues
- National Mourning
- Surveys
- Grants
- Multi-author Blog
- Newsletter
- CHIP Chatbot
- Visitor Analytics
- Optional page-builder blocks: FixMyStreet, PDF Page Turner, Planning Applications and Virtual Tour
Turning a feature off hides it from the admin menu, the public website and the page builder. Turning it back on restores it. Either way, any records you have already created are kept, and changes take effect immediately.

Some advanced or statutory modules are managed for you by your system administrator and will not appear in this list.
Friendly error pages
Your site now shows tidy, council-branded pages when something goes wrong, instead of plain technical error text. These cover common situations such as:
- "Page not found" (404)
- "No permission" (403)
- "Your session has expired" (419)
- An unexpected server error (500)
- A maintenance page (503)
There is nothing to set up — these appear automatically and match your theme.
Spam protection on public forms
A setting lets you rate-limit your public forms — such as the contact or enquiry form — by limiting how often the same visitor can submit them. This helps cut down on spam and abuse.